
I have been wanting for some time to be able to whiteboard in Teams calls without losing my video image, kind of something like this:

I finally made it work using Open Broadcaster Software, a tool that can combine videos from different sources into one. Disclaimer: I am a complete noob with video, so if you read this and have some advise for me, happy to hear it!
You can download OBS from here: https://obsproject.com/download. After installing it, start the program. The first thing we will do is creating a scene, which is a set of sources. To create a scene hit the plus sign below the scene list at the bottom left of the OBS window:

Now we will add our first souce to the scene: your whiteboard. Click the plus sign below the source list, and add a “Window Capture”:

Call it “whiteboardapp” (or anything else you like), you can leave the other options as they are:

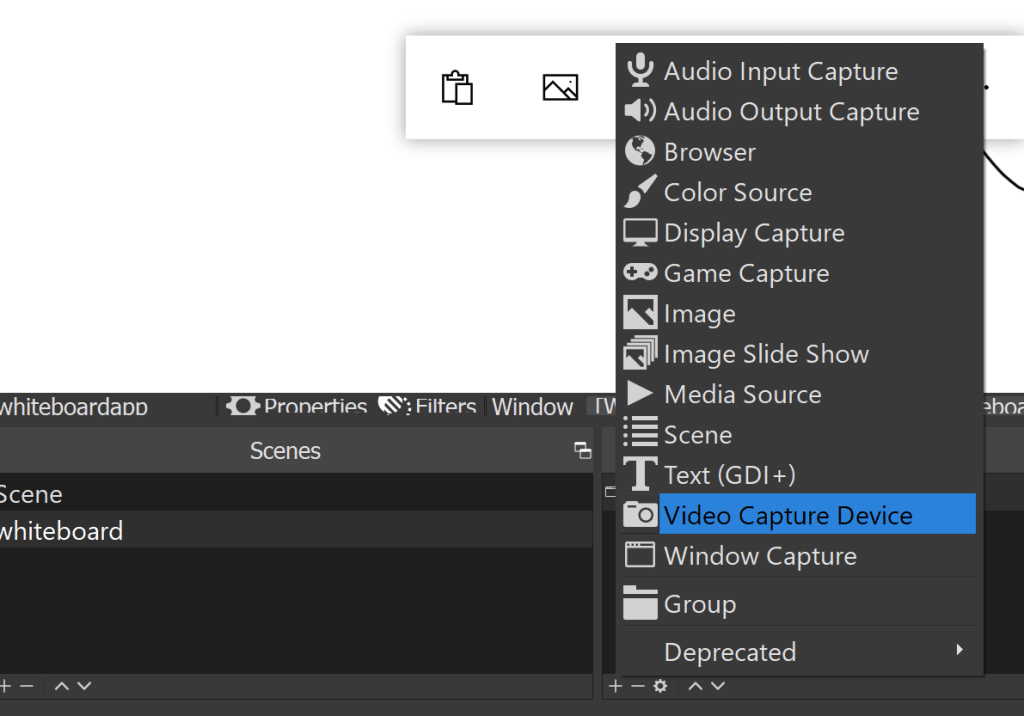
Now add your webcam as second source (“Video Capture Device”):
Now you should see something like this:
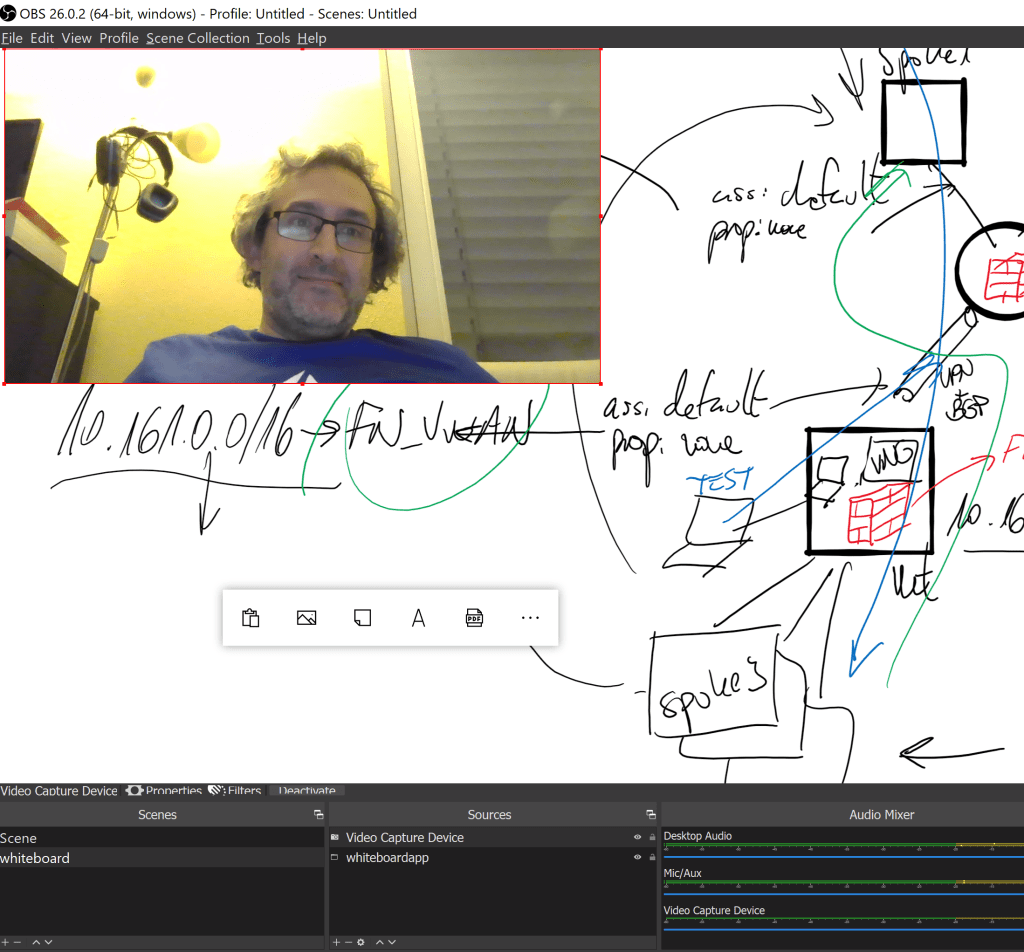
Mmh, it looks my face is in front of the whiteboard, but it should be behind. You can change the order of the sources dragging and dropping items in the source list, putting the whiteboard before the “Video Capture Device” (the first item is in front, the last one behind). You can rename scenes as well, I have renamed the “Video Capture Device” to “webcam” (I am a very lazy typer) and put it after (behind) the whiteboard:

Now your webcam image disappeared, because the whiteboard is not transparent (yet). Let us make it so: In the contextual menu for the whiteboard source, that you can access by right-clicking on its name, choose “Filters”. In the Filters window add a “Chroma Key” filter:
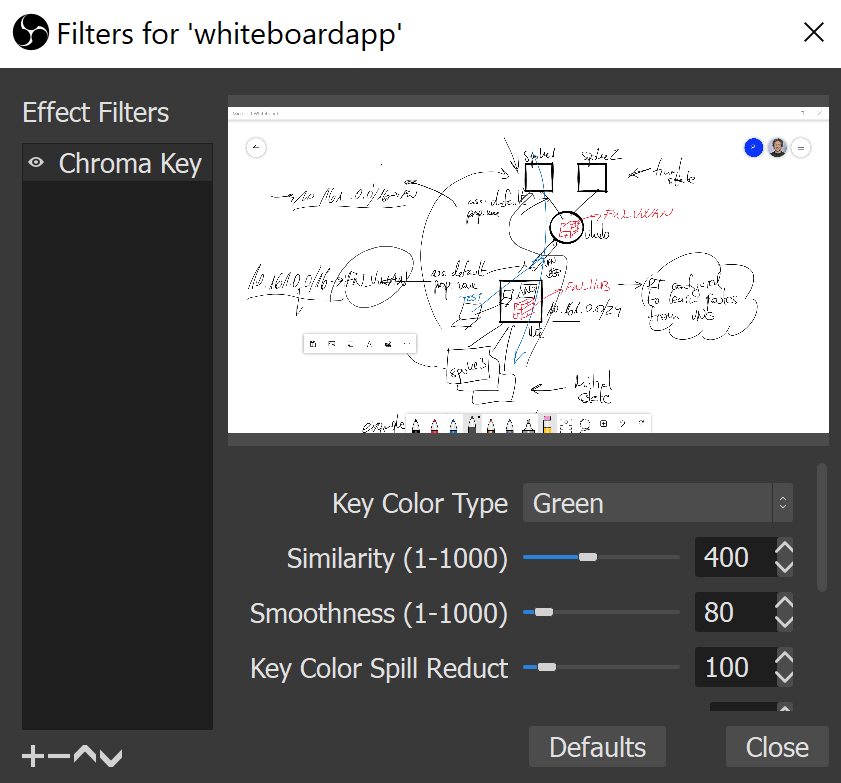
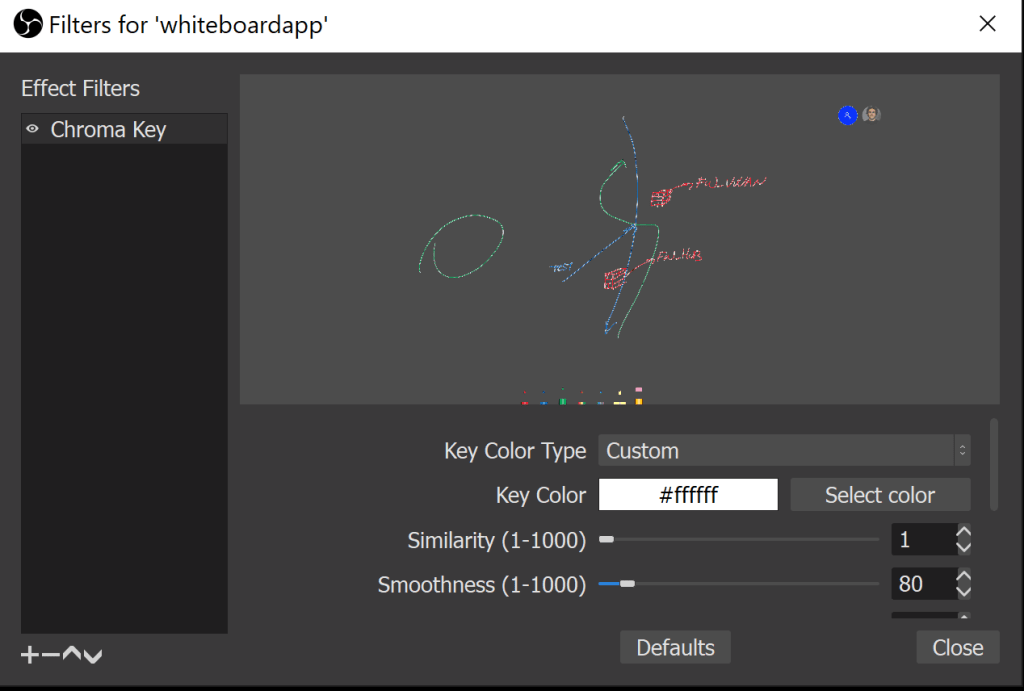
Chroma Key is the filter typically used in green screens, but we are going to do something different with it, and exploit the fact that it turns the selected color to being transparent. You can see the color selected as Key Color is green. Let’s change it to white:
We are almost there. If you have a high-resolution screen, chances are that not the whole whiteboard will be shown on screeen. The reason is because the canvas (the size of the scene) is smaller than the size of the screen, so OBS is only capturing a part of the whiteboard. Let’s increase the canvas size using the “Settings” button in the Controls menu, in the bottom right side of the OBS window:

In certain situations, OBS would not allow you to change the canvas size “because there is an acitve video output”. If that is the case, it is probably because the Virtual Camera is running. You can stop it going to the Tools menu, there you will see the “VirtualCam” option that will open a small video that will allow you to stop the camera. After stopping the camera, you should be allowed to change the canvas size.

Almost done! You should be seeing something like this, where the webcam image is too small as compared to the whiteboard (since it does not have as much resolution as the laptop screen):

Easily fixed: drag and drop the picture from your webcam (red rectangle delimiting your video image), until it is where you want it to be.
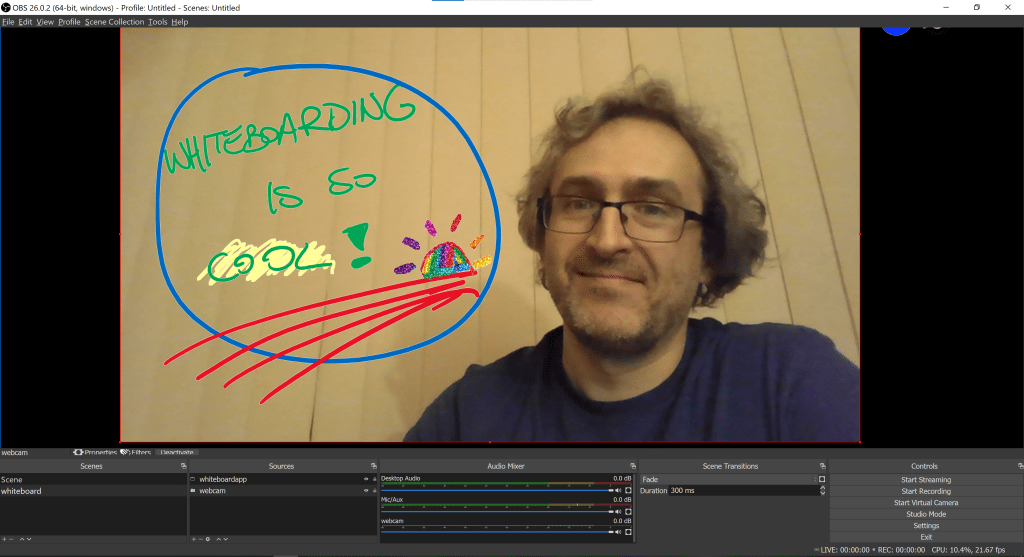
Now create a new whiteboard and paint something, whatever you draw will be super-imposed on your video image. One last note: do not use the black, since for some reason black is just treated like white by the Chroma Key filter if the key color is white, and it does not show on screen. However, other colors will show just fine:
So now we have what we want. In the Controls menu (bottom right of the OBS window) start the virtual camera. This will start a virtual device that is recognized by the OS as a camera. You might need to restart Teams to recognize this new device. When it does, it should appear in the list of available cameras:
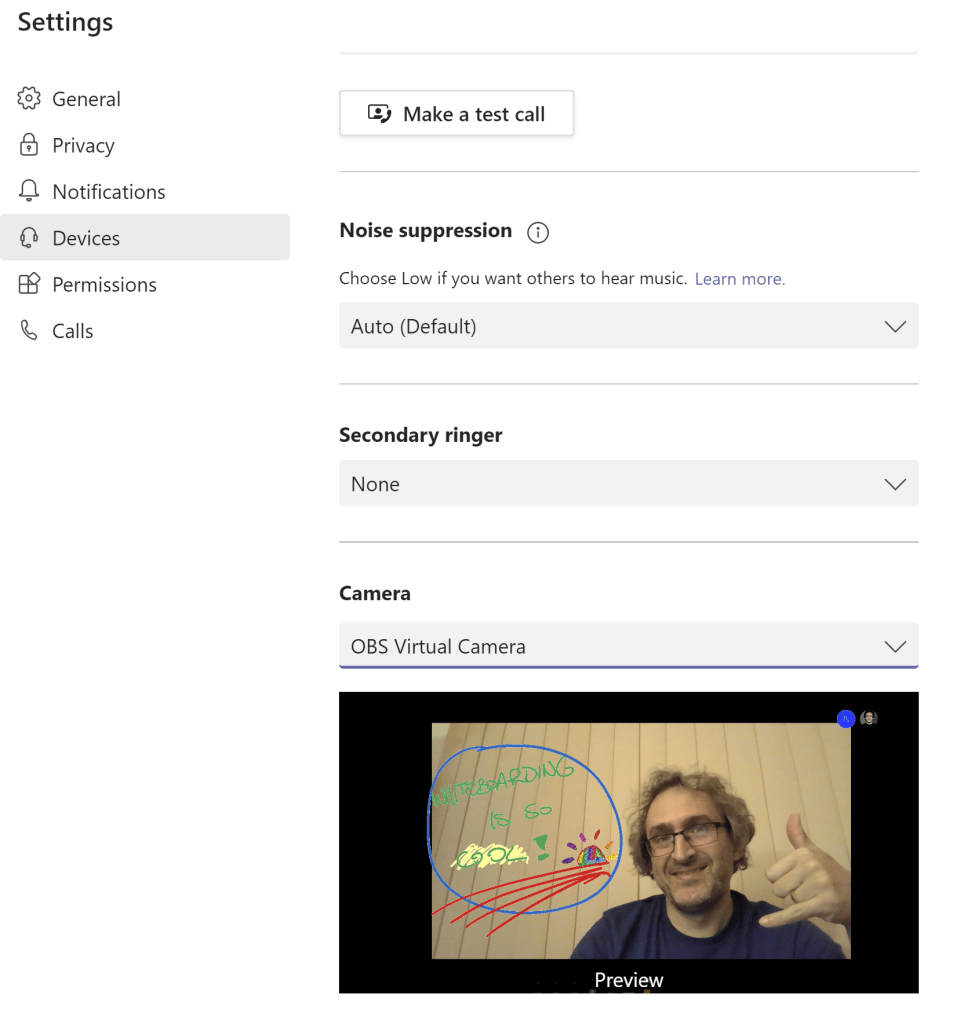
If Teams inverts the image, there is an easy fix for that: in the whiteboardapp source context menu, under “Transform” you can select “Flip Horizontal”.
When not in a call, you can stop the virtual camera in the Controls menu in OBS, or just close the OBS window, you will not lose the scene and the sources you created.
If you want to try out some options to improve colors (for example to show black ink), you can change the background color of the whiteboard (although the whiteboard does not allow to pick up any color), and select a corresponing key color in the Chroma Key filter in OBS.
So there you go, you can now flipchart like a pro from your sofa!
